Zoom recently released the ability for meeting hosts to automatically have live transcription for their in progress meetings. This functionality is driven by AI software and isn't perfect, but is a huge step towards accessibility for all in meetings, online conferences, and potentially even remotely delivered classes. This document will explain how to configure and start using the live transcription service in Zoom.
Step 1: Navigate your web browser to zoom.us and click the Sign In link in the upper right hand corner of the website.

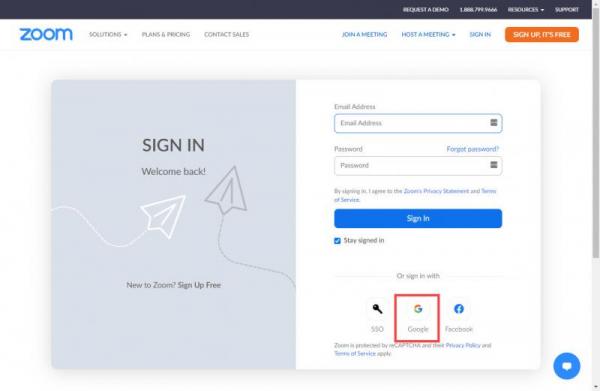
Step 2: On the sign in page, click the option for Google authentication at the bottom right.
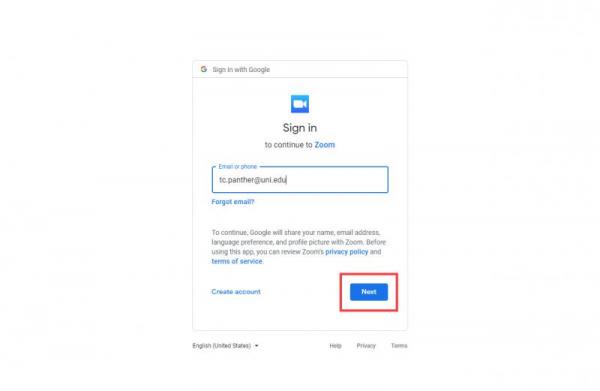
Step 3: On the resulting screen, enter your UNI Email address and click Next. The CatID login page will then be displayed. Sign in with your CatID username and password. You will also be required to authenticate to a Duo Multi-Factor Authentication (MFA) prompt.
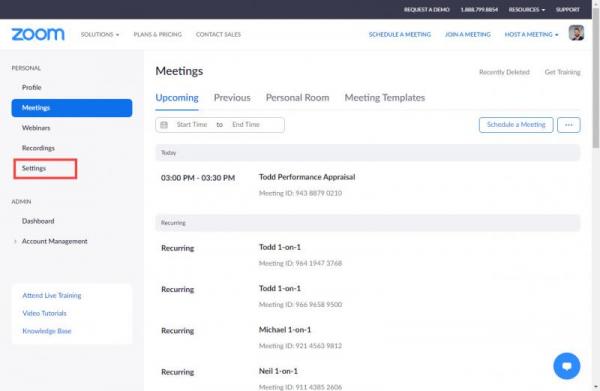
Step 4: You are now logged into the Zoom website and can see your meetings and settings. Click on Settings in the left hand options menu.
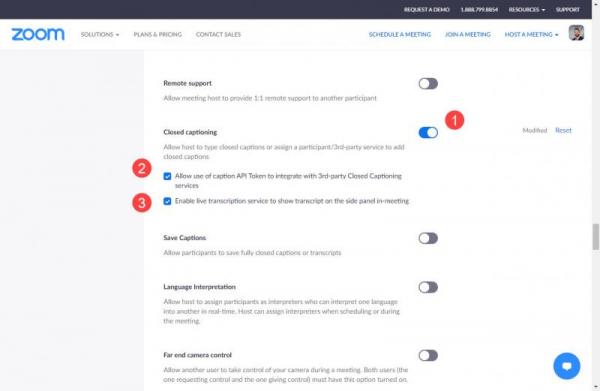
Step 5: Once on the settings page, scroll down to the section called In Meeting (Advanced) and look for the Closed Captioning section. Turn on the toggle for closed captioning and ensure both boxes below it are checked.
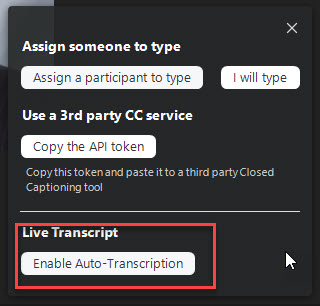
Step 6: When you are next hosting a meeting in which you'd like to provide live transcription services, click on the Live Transcript option in the zoom toolbar at the bottom of the screen.
![]()
Step 7: On the resulting menu, select Enable Auto-Transcription.
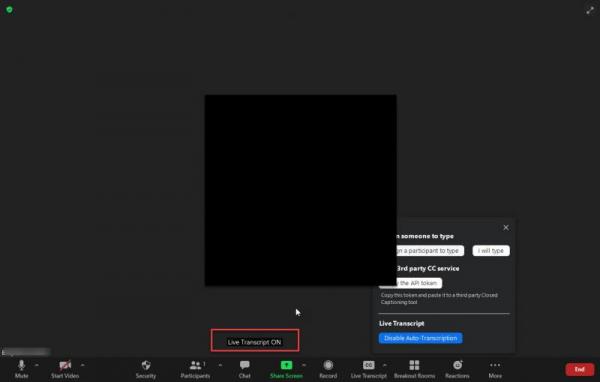
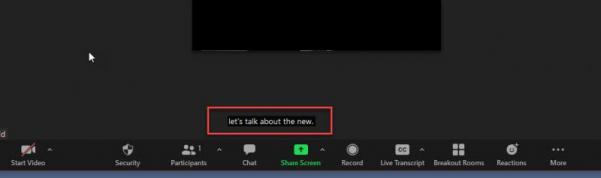
Step 8: Live transcription for the meeting will then be turned on and showing for all attendees.
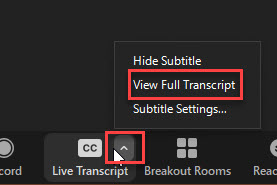
Step 9: You can also change the positioning of the transcription to be in a side bar on the right hand side of the screen. This can be handy because it will try to display who said what. To enable this, click the carrot pointing up on the Live Transcript button on the bottom of the zoom interface and then choose View Full Transcript from the resulting pop up menu.
The full transcript then appears on the right side of the zoom interface.