Connecting your wired device on ResNet can be done in two easy steps. First, connect your device to a wired data jack in your room. Then, register it for access.
1. Connect to a wired data jack
The first step to connecting is to connect to the data jack in your room. This varies based on your hall location. Plug your Ethernet cord into your Data port and then into your device.
If your data port is physically damaged, please contact the Department of Residence to report this.
Residence Halls
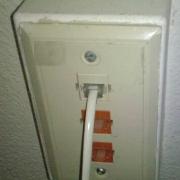
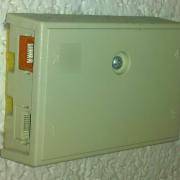
Data ports in the buildings below are orange and say "Data" on them.
 |
 |
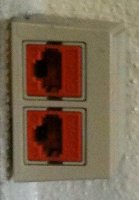 |
| Hagemann, Noehren, Rider, Shull, and some parts of Campbell | Other parts of Campbell | Bender and Dancer |
Panther Village and Lawther
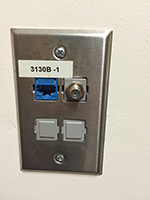 |
| Panther Village and Lawther data ports are blue |
ROTH
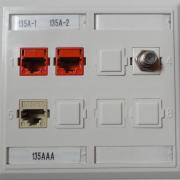 |
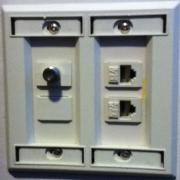 |
| Most of ROTH (the Data jacks are orange) | Some of ROTH (the top port is a Data jack) |
2. Register your device
Now you just need to get your device registered. Find your device type and follow the instructions below.
Windows and MacOS
After plugging in, try opening a web page. You should be redirected to the ResNet registration site. If this doesn't work, be sure all of your network settings are set to automatic (no static IP or DNS settings). You will be directed to log into the registration site with your CatID login information, give your device a description, and within seconds be able to browse the web.
Microsoft Xbox
1. Open up Settings and go to Network.
2. Select Advanced settings.
3. Find your Wired MAC address:
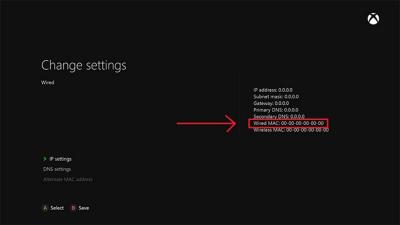
4. Register your device here. Note: this link is only accessible from on-campus at UNI. Log in with your CatID, fill out any information needed, then choose the Add button to add a device. Type in the MAC address you just found and choose Submit. Reboot your device and you're set to go.
Sony Playstation
1. Go into Settings and visit the System icon.
2. Select System Information.
3. You will see your MAC address listed on this screen containing letters and numbers in the format xx.xx.xx.xx.xx.xx.
4. Register your device here. Note: this link is only accessible from on-campus at UNI. Log in with your CatID, fill out any information needed, then choose the Add button to add a device. Type in the MAC address you just found and choose Submit. Reboot your device and you're set to go.
Nintendo Switch
Note: You will need to purchase a wired USB adapter and connect it to your Nintendo Switch. These can be purchased online.
1. Select System Settings from the HOME menu.
2. Scroll down and select Internet.
3. The MAC address will be listed on the right. Make sure you use the wired adapter's MAC address.
4. Register your device here. Note: this link is only accessible from on-campus at UNI. Log in with your CatID, fill out any information needed, then choose the Add button to add a device. Type in the MAC address you just found and choose Submit. Reboot your device and you're set to go.
AppleTV
1. On the main menu, select Settings, then General, then Network.
2. Find the "Ethernet Address" or "Hardware Address". This is the MAC address you'll need to add in the next step.
3. Register your device here. Note: this link is only accessible from on-campus at UNI. Log in with your CatID, fill out any information needed, then choose the Add button to add a device. Type in the MAC address you just found and choose Submit. Reboot your device and you're set to go.
TV
Note: Only TVs with a wired network port can register for access since TVs do not support WPA-Enterprise for wireless access.
1. Find the wired MAC address for your TV. Finding this varies by manufacturer. Visit their website for additional information on finding this.
2. Register your device here. Note: this link is only accessible from on-campus at UNI. Log in with your CatID, fill out any information needed, then choose the Add button to add a device. Type in the MAC address you just found and choose Submit. Reboot your device and you're set to go.
Wireless Routers
Personal wireless routers are prohibited from use on ResNet and a violation of UNI's Acceptable Use of Technology Resources policy.
Still need help?
Contact the IT Service Desk.


